

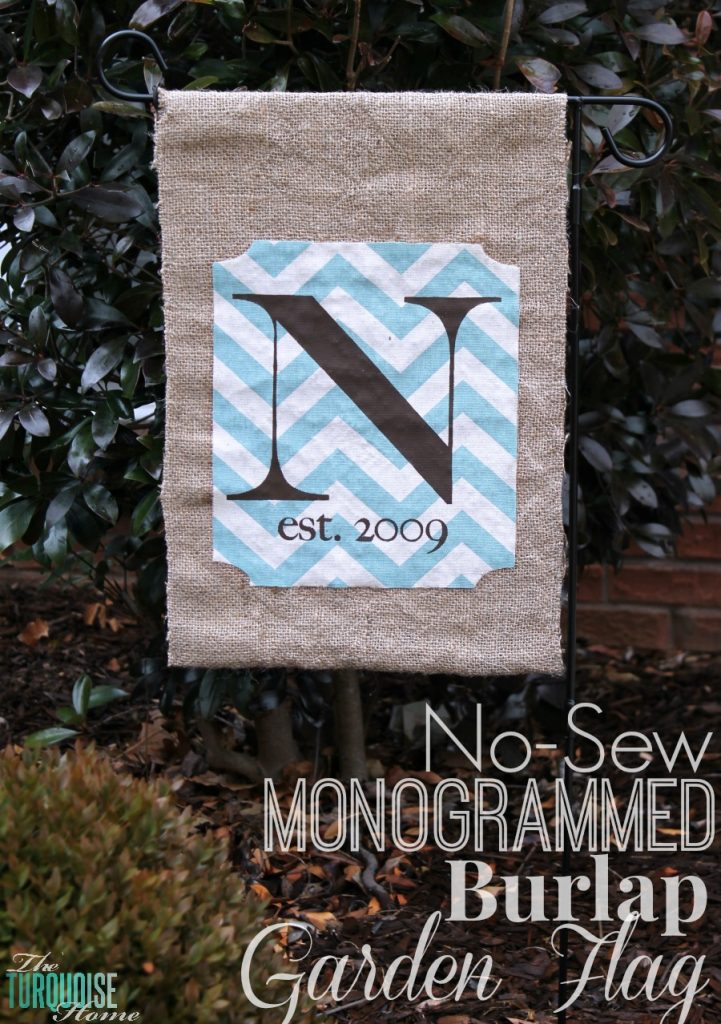
How To Make A No Sew Burlap Garden Flag
A simple and easy DIY Garden Flag is a stylish addition to the front entry of any home. The personal touch is a warm and inviting custom accent!
Original post date: February 10, 2014
Good morning! They are predicting snow this week in northern Alabama, which will actually be a first for us this season. {Even though it's been the coldest on record in more than 50 years!} But while the forecasters are calling for white stuff, I'm dreaming of warmer weather. {How 'bout you??} And I spent some time last week planning for brighter and sunnier days!

This simple DIY project is so easy, and if you're anything like me, you probably have most of these supplies already on hand!
This post contains affiliate links for your convenience. See my full disclosure.
Supplies to Make a DIY Garden Flag
- Garden flag stand
- Burlap {12.5″ x 40″} or any other fabric you like. Canvas would work great, too!
- Glue gun
- Fabric of your choice
- Paint & stenciling brush {spouncer}
- Outdoor Mod Podge
- Craft Sealer for outdoors
- Silhouette cutting machine {optional}**
- Contact Paper {or any kind of paper for stencil}
**If you don't have a Silhouette cutting machine, you can use a craft knife or small, sharp scissors and card stock paper to make the stencils!
DIY Garden Flag Step-by-Step Tutorial
Step 1. Gather Supplies and Pick up a Garden Flag Stand
First, I picked up a garden flag stand. You can usually find these locally at a hardware store if you need it today!
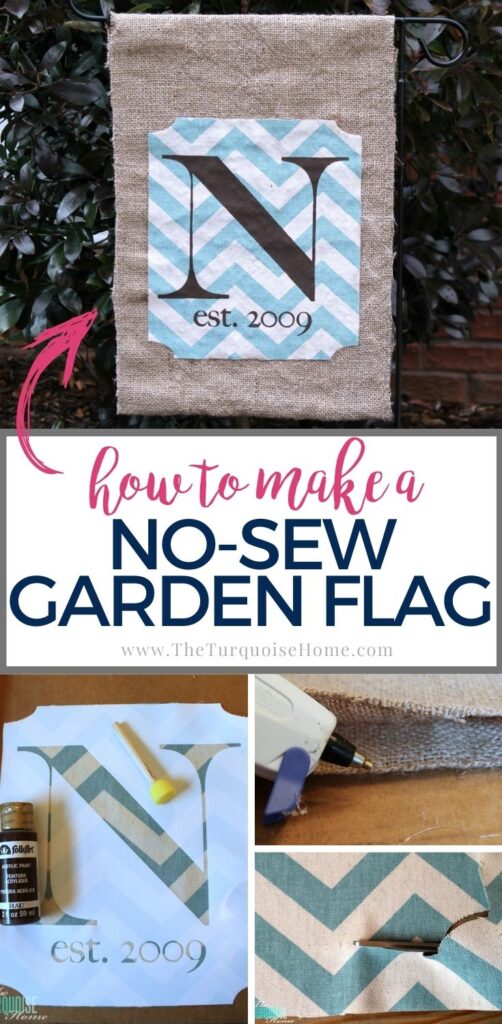
Step 2. Cut and Iron Your Background Fabric
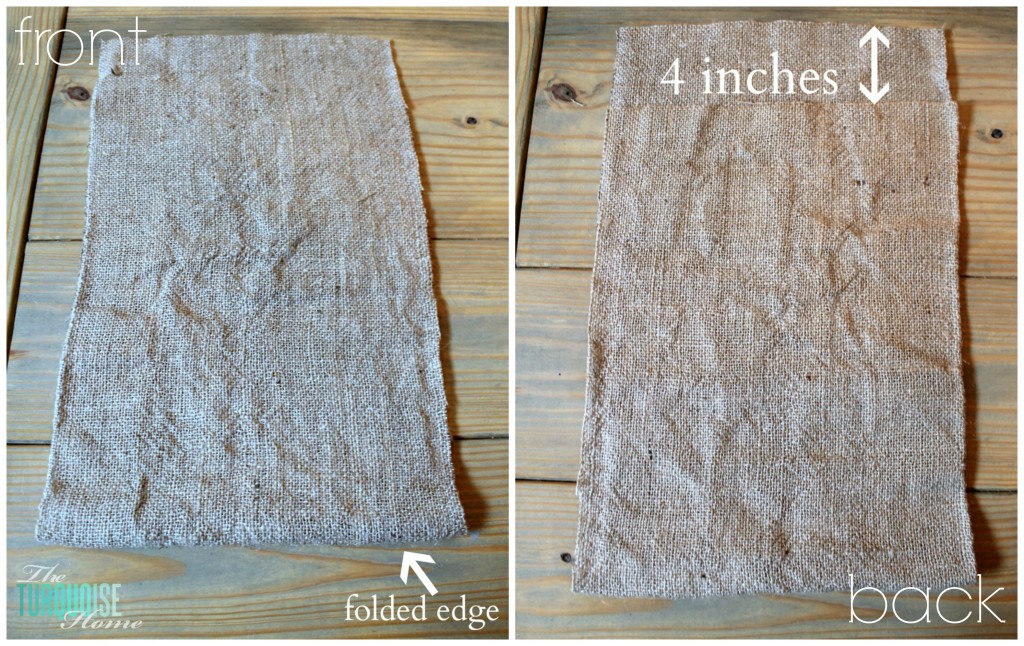
Then I ironed and cut my burlap to the size I needed. I looked online and found that most garden flags are 12.5″ x 18″ and that size fit my stand. So, I measured out a piece of burlap at 12.5″ x 40″. I wanted to just fold it over and leave about 4 inches at the top to fold over to be able to insert the flag into the stand.
Step 3. Make the Flag Background and Create a Pocket for the Garden Stand
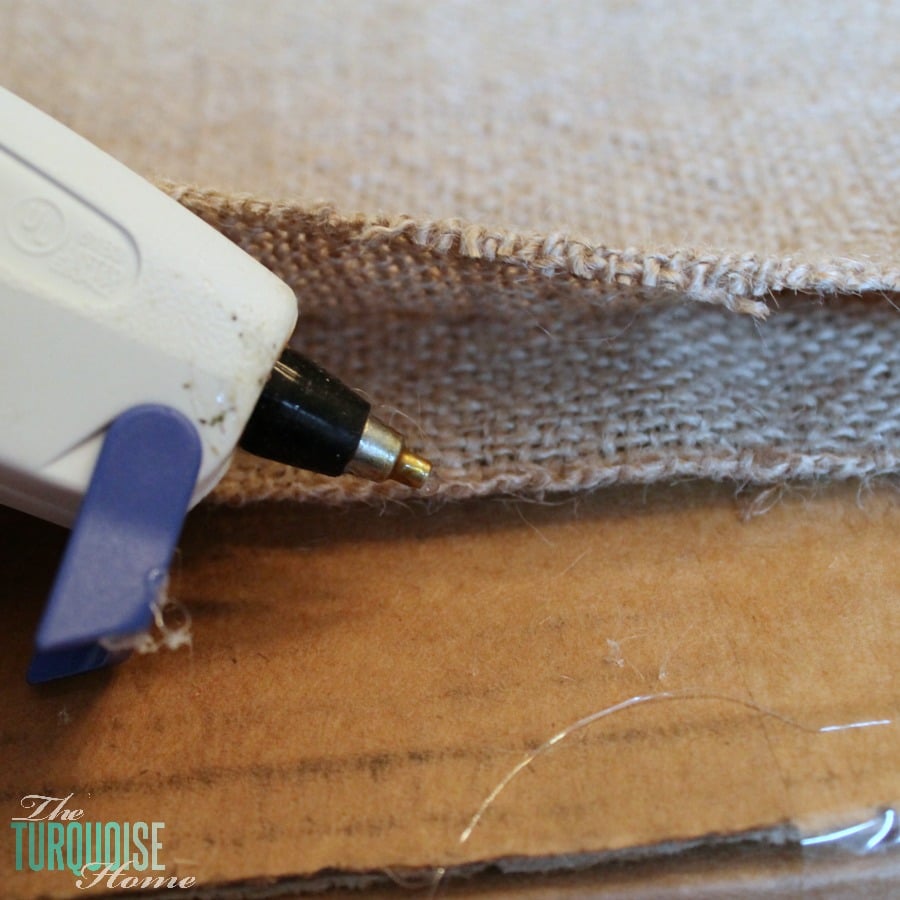
I used my glue gun to seal the two side edges of the burlap. I was lazy and didn't want to get out my sewing machine. 🙂 And then I folded the top extra 4 inches down and glued the top of it to the top of the back piece, creating a 2-inch pocket. Hopefully that makes sense, because I didn't get a picture of that step. But you'll want about an opening at the top for your flag to slide onto your flag stand.
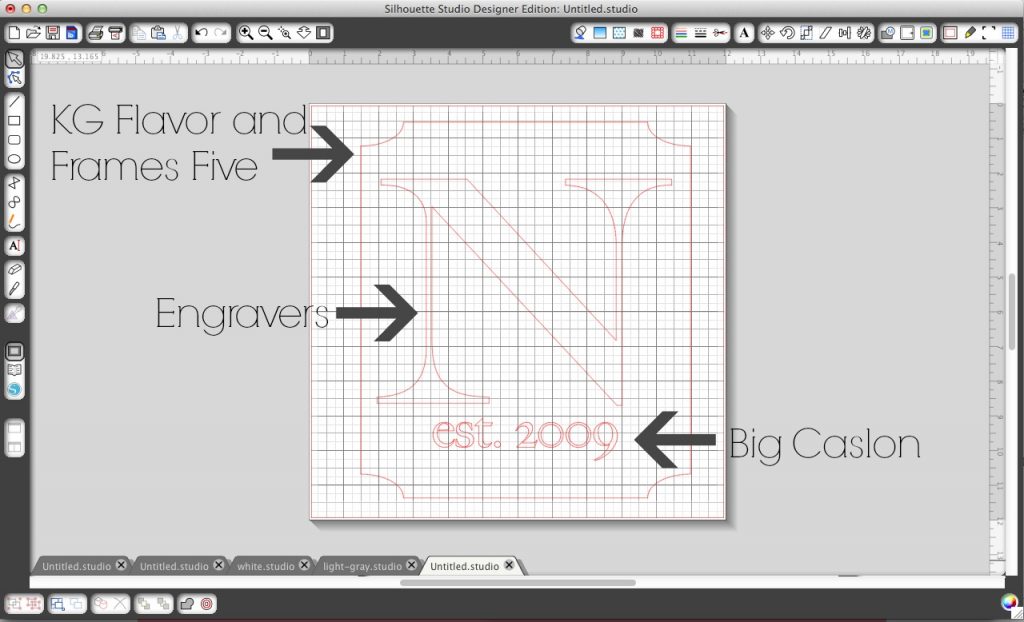
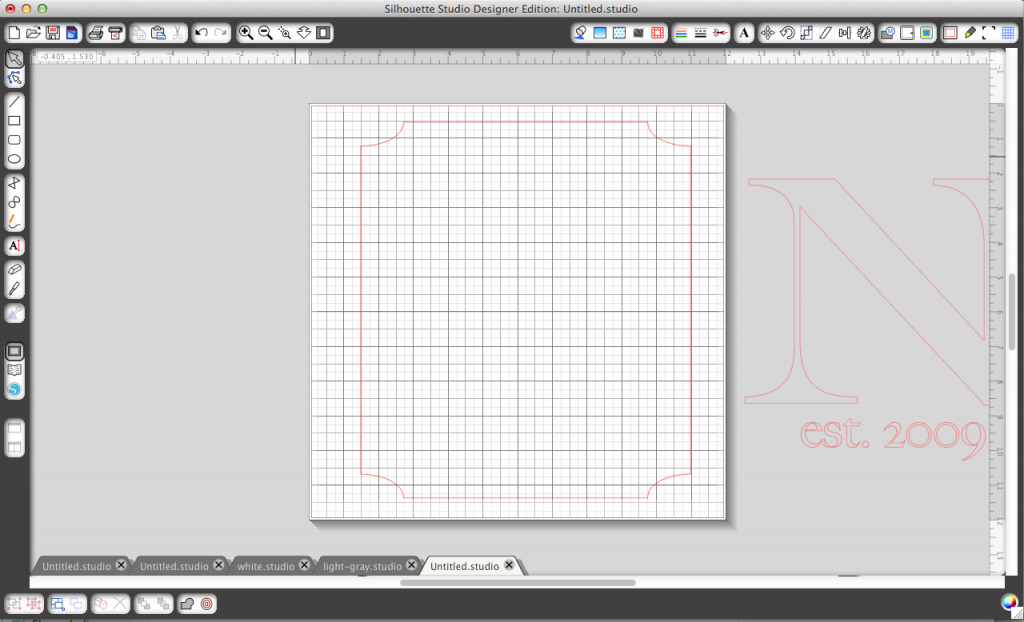
Step 4. Design the Monogram & Frame in the Silhouette
Note: If you don't have a Silhouette, you can skip this step. But if you want to use the same fonts that I used, pay attention to those in this step!
I then designed my monogram in my Silhouette machine. I used a frame from KG Flavor and Frames Five font to make my frame. And I used Engravers font for the letter monogram and Big Caslon font for the "est. 2009."
Step 5. Cut the Frame out of the Fabric
Note: If you don't have a Silhouette cutting machine, it would be easy to simply make a template and cut it by hand!
First, I needed to cut out the frame from fabric. In order to do that, I had to move the monogram and "est. 2009" off of the mat. I had already gotten everything in just the right position, so I didn't want to just move it around willy nilly. So, I scooted it over using the right arrow just enough to get it off the mat.
At this point, I was ready to cut my fabric. I'd never cut fabric before with my Silhouette, but it was simple and easy!
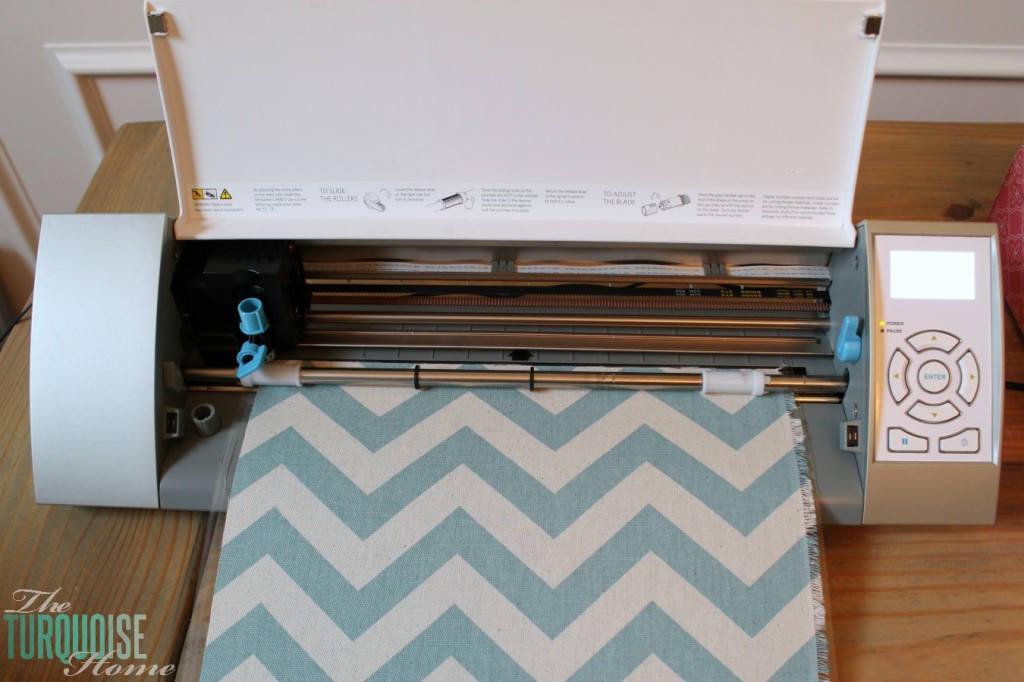
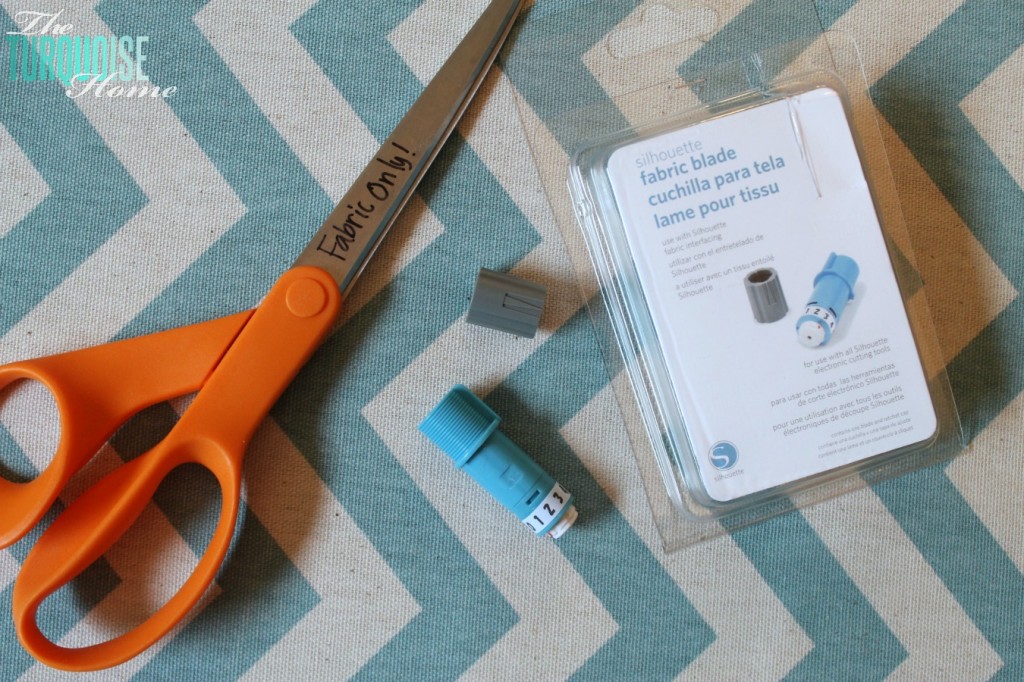
I used my new fabric blade. It's the same blade as the other Silhouette cutting blade, only it's housed in a blue casing to keep it separated. You want to only use it on fabric, just like you have fabric-only scissors to keep them sharp.
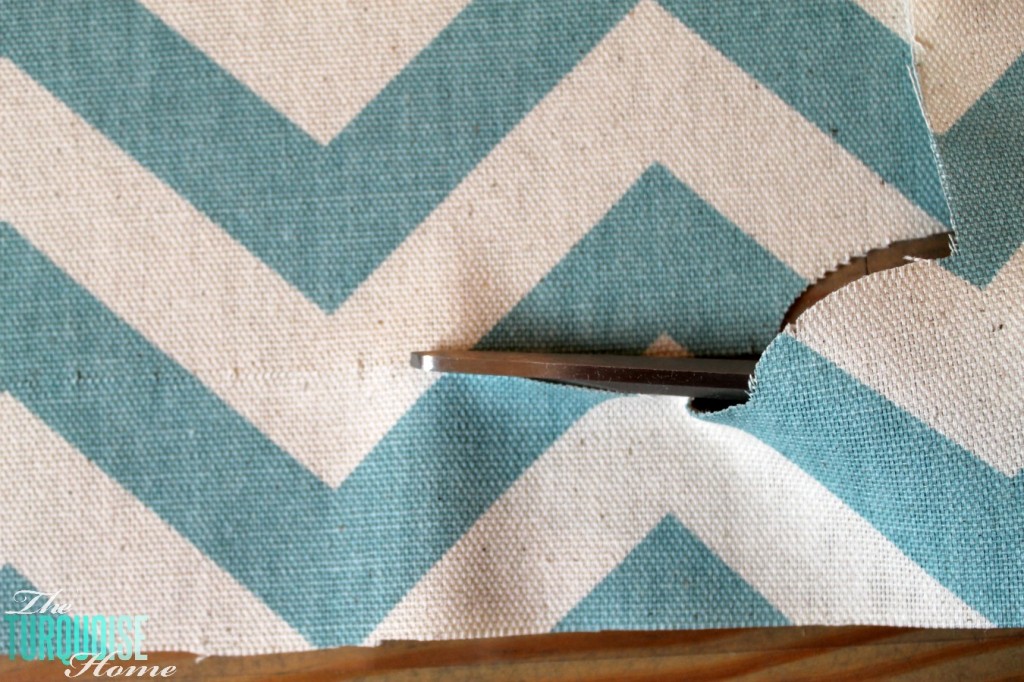
I bought my fabric at Hobby Lobby. It's a duck cloth fabric, which is heavier, like canvas. So, when I went to set my settings to cut it, I chose a blade setting of 4, which was between the Fabric {thick like canvas} setting and Fabric {thin like cotton prints}.
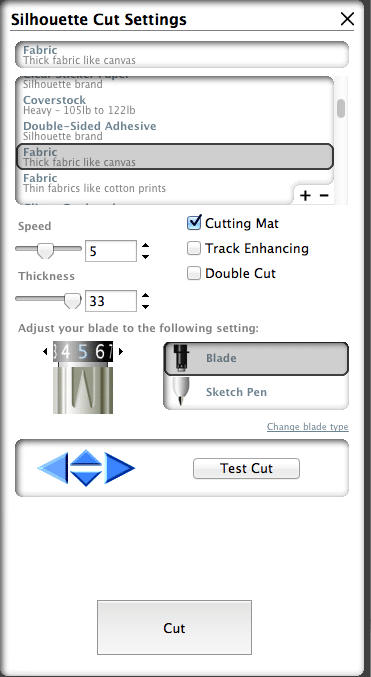
But in hindsight, I should have just picked the "thick like canvas" setting, because it didn't cut through the fabric completely all around. I had to use my scissors to cut through some of it.
{Now, if you don't have a Silhouette, then this would be an easy shape to print off onto a piece of paper and just cut out a stencil from cardstock.}
Step 6. Create a Stencil for the Monogram
Note: If you don't have a Silhouette machine, print out a letter and "est. _____" on an 8 x 11 piece of card stock paper. Then cut it out with sharp scissors or use a craft knife.
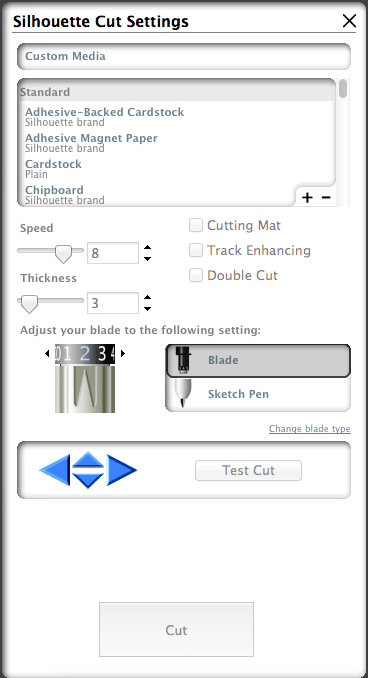
So, then I needed to cut out my monogram stencil. I decided to use contact paper since I've used it before with fabric and it worked well for me, and I had some on hand. No need to go out and buy something new! I used my normal contact paper cutting settings, but the blade setting of 2 wasn't working for me. I had to bump it up to 4 in order to get a clean cut.
Normal contact paper settings:
Next, I cut the outline of the frame in order to know where to center the monogram. This made placing it on the fabric very easy!
Step 7. Stencil the Monogram onto the Fabric
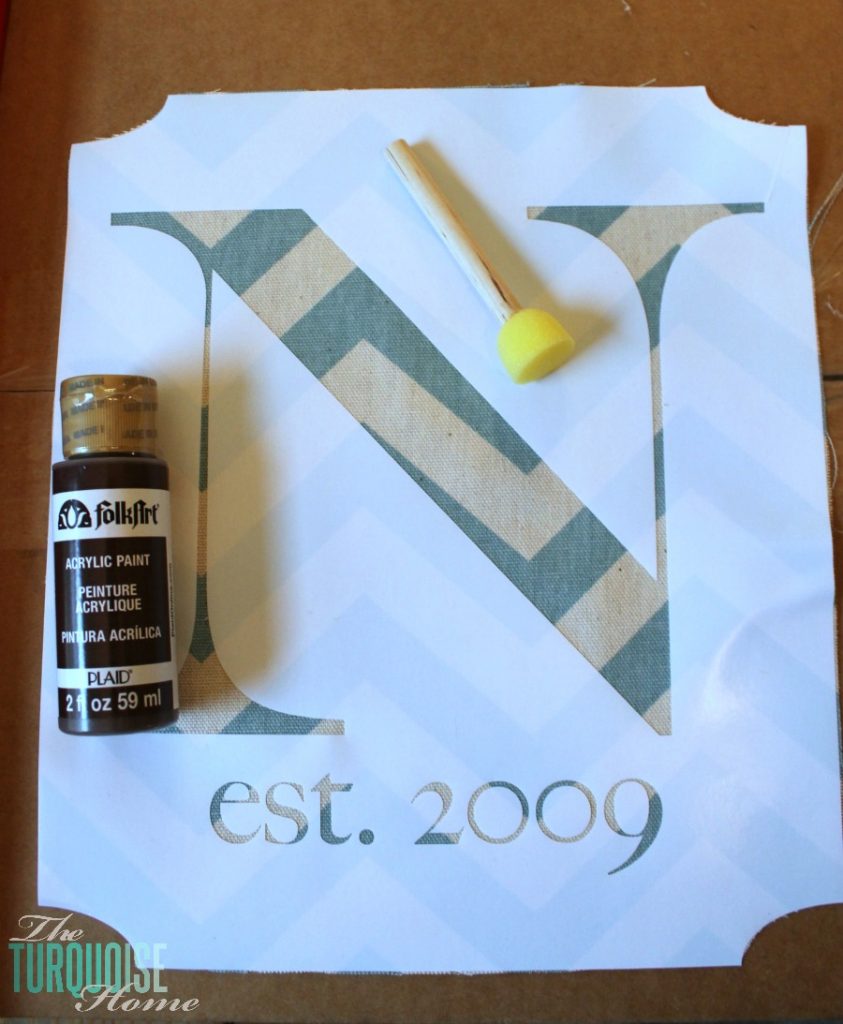
Then I just painted inside the stencil onto the fabric with a spouncer brush and brown craft paint. Always make sure to only use your spouncer brush in an up and down motion when stenciling. This will give you that pretty crisp line on fabric.
Once the paint is dried, lift off the contact paper stencil and admire your pretty monogram. 🙂
Step 8. Glue the Monogram to the Burlap with Outdoor Mod Podge
I used outdoor Mod Podge to adhere the fabric to the burlap.

Step 9. Spray all Over with Outdoor Sealer
Once the weather gets a bit warmer, I'm going to spray the whole thing with Aleene's Acrylic Spray Sealer in matte finish just to protect it from the elements. I took it outside to the front flower bed to take pictures, but I'm going to wait to keep it out there permanently until I've got the sealer on there and it's a bit warmer. I'd hate to see my cute new garden flag torn up.
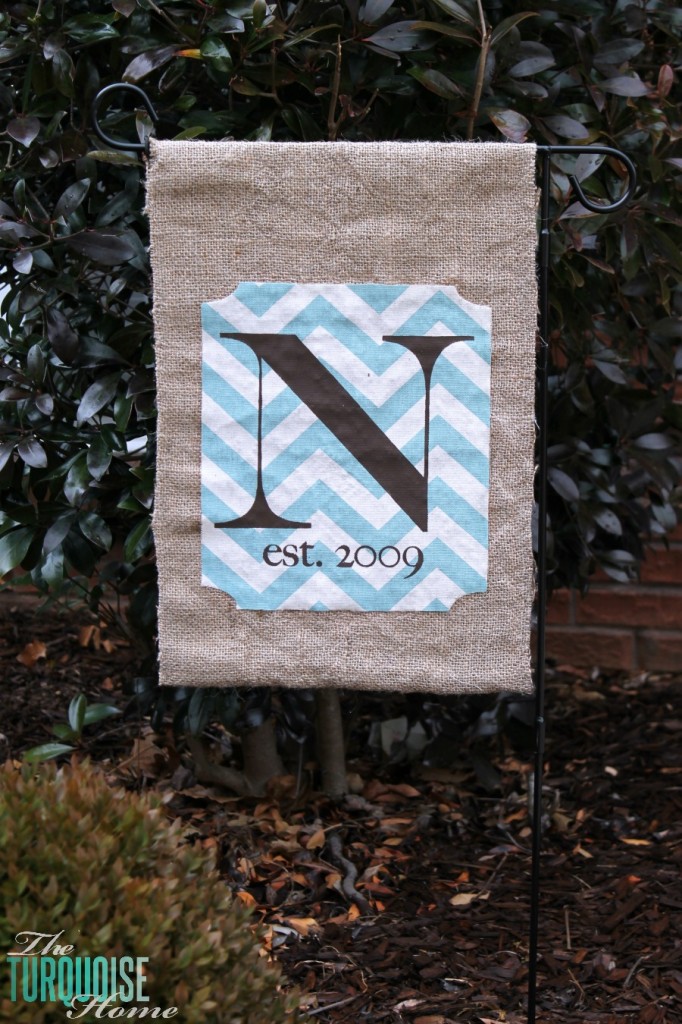
This is my first garden flag and I love it!
Do you love garden flags? How do you think this turned out?
MORE POSTS YOU WILL LOVE:
How To Make A No Sew Burlap Garden Flag
Source: https://theturquoisehome.com/no-sew-monogrammed-burlap-garden-flag/
Posted by: catheysopupose.blogspot.com
0 Response to "How To Make A No Sew Burlap Garden Flag"
Post a Comment